3D VFX NukeX and Maya February to May 2021. UPDATED: July 2021.
- eveb81
- May 9, 2021
- 12 min read
Updated: Jul 27, 2021
Nuke X and Camera Tracking

(Notes from: 26.04.21)
As I hadn't started this blog till March this year (2021) these notes will be from my memory and animation journal . I have done my best to recall key information however, these event's will not be 100%.
If and when this " * " icon appears I am writing from memory.
Short Disclaimer:
Videos 1 - 8 were completed in February long before this blog was started and notes were in not recored and therefore information will be recalled to the best of my recollection.
Final Video Output.
Video 1: Panoramic Photo's to HDR Image in Photoshop.

*
What I remember about this video is that it went fairly smoothly. We had to import the phots from the live plate to photoshop and and merge them with the HDR exporter.
By taking the slider up and down, to the furthest points you can find the areas of extreme inside the photo.
There are a few simple steps you need to do but, as I said this was done at the very beginning of February and the only real issues I can remember about it is the name that we saved it under as later in another video it is referenced with another title.
Some of the Provided Assets:
The Live-Plate and Car:

Lens Distortion Pipeline:

Photo Stills:


Gallery:


Video 2: NukeX Intro and Converting 4K to 1K.

*
What I remember about this video is that the trial of NukeX had some glitch in it and therefor wouldn't load up onto my computer. I tried for over a week emailing the foundry back and forth. The only course of action was to use the RDP login through the university.

Now the RDP is great for remote learning and wonderful for getting access to software that you just can't get anywhere else but, it does come with some little annoying habits of its own.
First you have to keep logging in and I mean a lot. Plus there is a little message that pops up about every minute to tell you that you are logged in. When you are in and finally working it creates this message about as many times as it tells you that you are logged in.
But, there's more...
Once you get a good rhythm going and you're flicking between screens, as I had to do because I'm on a Mac and not a PC someone comes along and kicks you off the computer even if you've still got time left in the day or booked it for another hour or so.
Highly frustrating.
Next comes the headache of getting past the problems of uploading the files from one computer to another.
After that, finally you're free and clear to get down to the job at hand:
Going from Nuke-X to Maya.
Now I've had a little experience with Nuke and I stress "Nuke" and not NukeX and I stress "little" too.
NukeX is a little bit different, not a lot but, a little. I understood the nodes, the reads and the connection pipes and how things linked up which really helped speed up the process. It is nice to see the pipeline this way and it really helps me visualise the process.
This video was mostly about getting the Live-Plate into NukeX and setting it up for the lens distortion and again all I really remember are the issues getting into computer to begin with.
One login

after another

and then buffering.

Gallery:


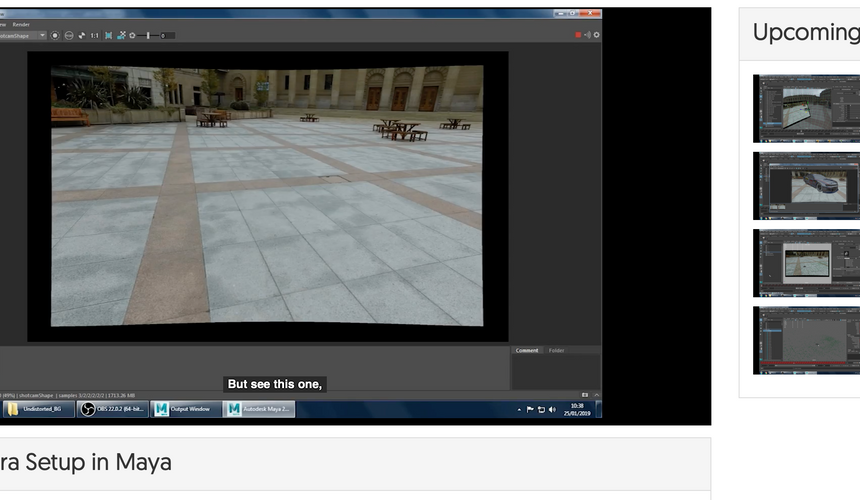
Video 3: Removing Lens Distortion.

*
So once I'd done the tracking of the 1K video from 4K, or was it reformatting of the Live-Plate, this is where I really wish I'd kept some notes.


I remember the Parallax was the key to this next part of the process.
"the displacement or the difference in apparent direction of an object as seen from two different points not on a straight line with the object especially : the angular difference in direction of a celestial body as measured from two points on the earth's orbit."
(google.com)

In order to un-distort the video the curved lines need to have straight lines added and this was made easy due to the footage being filmed in a square where the ground patten is geometric.
Once again I don't really remember much about this video other than it was a bit time consuming trying make sure everything was alined. After you click solve you can flick between the undistorted and the distorted and see the difference between them.
It's also good to remember that when you un-distort something and stretch it it becomes bigger and the boundary box around the area needs to be noted so you can resize the back plate. I don't remember what my new sizing became but, I remember that it wasn't whole numbers.
Gallery:


Video 4: Camera Tracking in NukeX.

*

Once again nothing major happened during this video but, what I do remember is to do when you save a file as a jpeg. It is important to use the "****" four stars.
By this point in the process I had change the 4K format to 1K and made a backdrop for all the nodes to keep everything together and organised.
This video was good for adding different nodes like camera trackers. Tracking works mainly on the x and y axis.
It is also important to make sure that the right camera is selected before you press "track" on the NukeX system as this will determine end result and could complicated things later down the line if isn't set right.
Once you've pressed solve then things really get going. The result gives you the markers that you need for tracking. A good range to aim for is around 60 in the green.
Again my memory from this video is limited due to the fact that nothing major happened during it and I moved on quickly to the next one.
But, don't forget to save the file. That is very important. You must save the file.
Gallery:


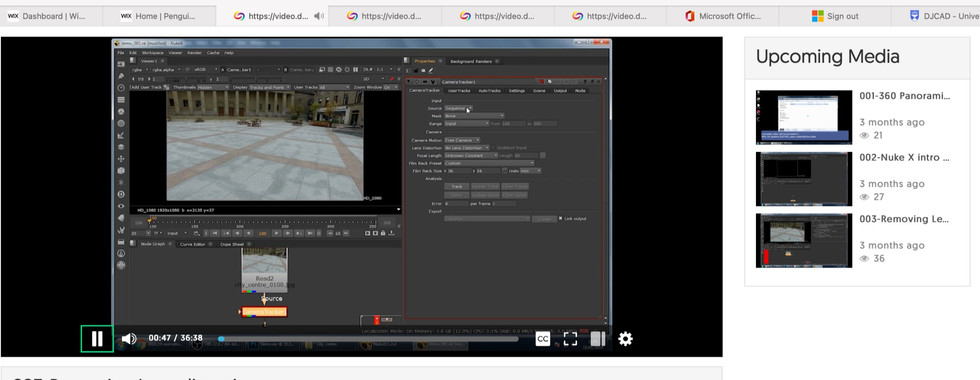
Video 5: Solve and Fine Tune the Camera Track.

*
This Video is one that I do remember. It's still a little hazing but, I do still remember it and for all the wrong reasons.
Once you've pressed "track" then you get to see how the last 4 videos have really worked out.
My camera tracking result.

Sang's result of tracking.

It is really obvious that red is bad and green is good and I have a a lot of red to green than to green to red.
Now how to fix this.
You are aiming for about 0.5 or 0.6 anything above that is bad. Very bad and above 2 is in my mind a disaster. Mine, mine was 1.56..... with lots of numbers after it and that's when I knew I had problems to solve.
It is important not to go too low because if you reduce down the trackers too much. But for now to reduce down the red and get a more green into the picture. To do that I had to get into the graph editor.
This not the graph editor that I used this is just an example of the graph editor.


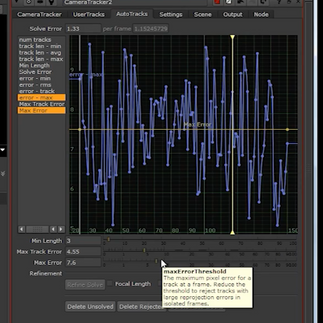
It's really annoying that I didn't keep any records from this time. I wish I had. But despite not keeping records I know that with a little time and patience things all worked out.
After completing this next we got to Maya.
Gallery:


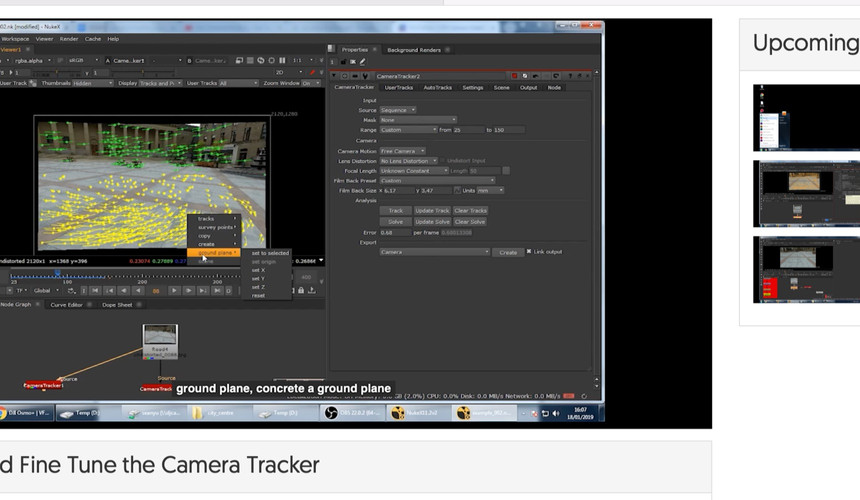


Video 6: Import the Tracked Camera into Maya.

*
I really need to make notes whenever I do these videos because my memory is astoundingly terrible.
Now it was time to bring the footage into Maya once I'd set up the project correctly.
In this video I learned about the render settings. It is always good to set up the render settings. Check the path and make sure that it correct. This will cause you problems later if you don't.
If you don't see the F.X.B then turn on the plug-in from the windows menu.
Once you are in Maya with the tracked points you can get started with the model but first to see the camera you can select the camera from the outliner and in the window hit "F" key and it will show the camera (neat). I must remember this shortcut.
If you do have any issues you can go back into the graph editor once again to fix them. Fortunately for me I didn't so I could move onto the next video.
Small note: When you import your image look through the "Shot Cam" or "Render Cam" or whatever you have called the camera. Do NOT add the import to the perspective camera.
Gallery:


Video 7: Camera Setup in Maya.

*
When importing it is important to remember what it is that you are importing. This was an image sequence not a movie and it was Jpeg files.
Once you have improved the Jpeg files the locators disappear.
The process to fix this is:
1. Highlighting the shot camera 2. Go to Attribute Editor 3. Find Image Plane 1 4. Find "Placement" which is about half way down 5. Locate "Depth" 6. Add a few more zeros "0" about 1 should do it
I only mention this because it is important that you see all the locators.

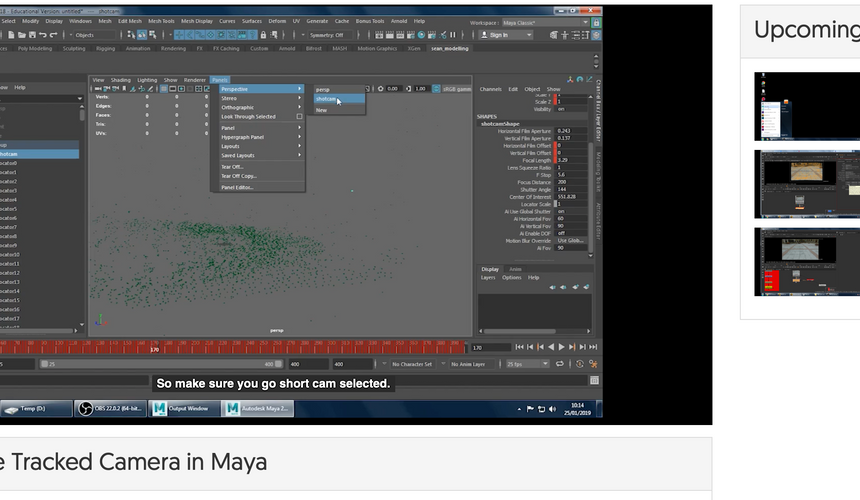
I remember one time I opened up Maya to discover that my car had shrunk down to a match-box size.
In the end it wasn't that bad, all I had to do was select everything and resize it again. But it was quite comical to see this tiny car in the big square.
Gallery:


Video 8: Import the Model and IBL Setup in Maya.

*
Roughly from about here I started keeping a record of the progress I was making so this was a little easier to recollect than the previous videos nevertheless, the memory is still a little hazy.
Now that I'd uploaded my model the real work could begin.
I increased the camera size by scaling up and breaking the connections allowing me to keep the camera size not matter what time I'm on the timeline.
Grouped the car and camera
Centred the car into the frame
I also added the Ai sky-dome from the Arnold Menu
Remember: do not move the camera up and down and you have to match the A.V.L rotations axis to the backplate.
Gallery:


[ VIDEO 9 DOES NOT EXIST ]
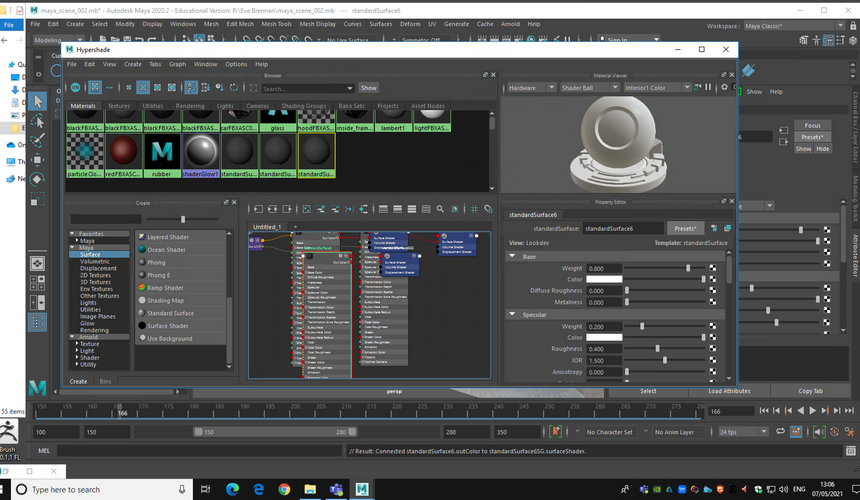
Video 10: Car Model Shader Setup in Maya.

*
Shaders. Materials.Textures. This setting can be found in Render Editors from the Windows menu in HyperSade. The strangest thing in mine was that I had no rubber preset for the wheels.

On our car we used the Ai standard surface for all the surfaces on the car before selecting individual areas for specific surfaces. I really like the teal/green metallic colour and I was slightly worried when it came out black on the screen but I discovered that it was supposed to look like that I was able to relax.
I really enjoyed learning about all the shaders and materials. What impact they had on the car within its environment.
Gallery:


Video 11: Directional Light and Arnold Shadow Matte Setup in Maya.

*
Now it was time for Light and Shadow:
With a simple directional light. For setting up the directional light it is important to reference other light sources inside the scene. That way when you take the model back into NukeX it won't seem so out of place and confuse the viewer. You achieve this by adding a floor in Maya which is a plane surface from the crate polygon primitives menu.
Remember: Not to move "Y" axis. If you move the plane on the "Y" axis it will mess everything up in the scene.
Then it really is just about adjusting and tweaking things till they look right for the scene.
Gallery:


Video 12: Render Optimisation in Maya.

*
Now it's time to render. What we need from Maya is the model its self.
You need to turn off the Image plane and camera.
At this point everything should be done:
Shader/Lighting/Shadow/Materials etc
Now it's time to sort out the noise in the shadow and on the car.
Once that is completed you can prepare the model for moving over to NukeX.
Gallery:


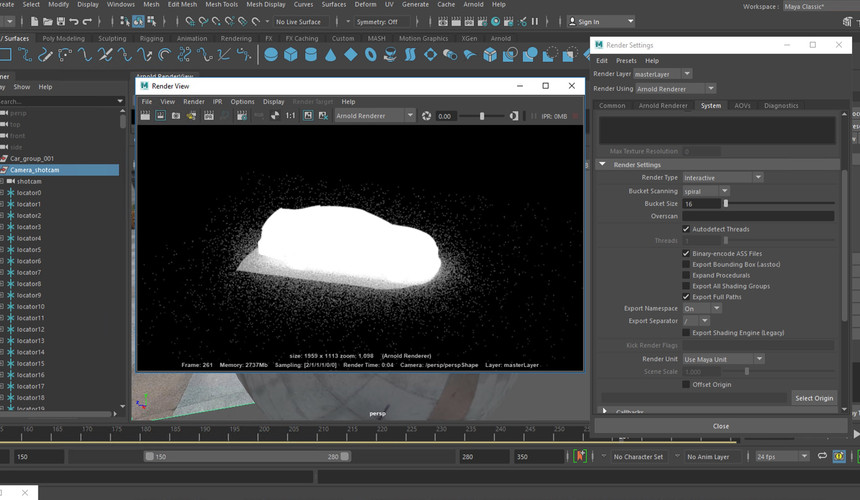


Video 13: AOV Setup and Render Setting in Maya.

I am very very lost at the moment. How could I forget to do the very last two videos until the very last day (this can not happen in the next semester).
If I can't save my file in Maya I can't open it in NukeX.

What am I going to do?
Gallery:


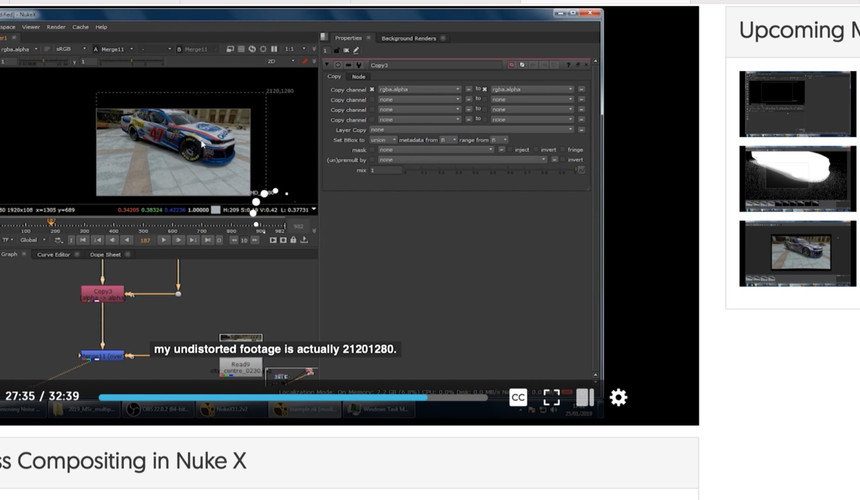
Video 14: Multi-Pass Compositing in NukeX

Now what?

what do I do now?
Check back soon to find out if I ever found out the answer to this mysterious question.
Gallery:


Final Outcome Videos: (April 2021).
Video 14: Multi-Pass Compositing in NukeX (completed July 2021)

This video started off a bit rocky, if I'm honest. However, that was not going to deter me from my goal of successfully finishing this camera tracking project.
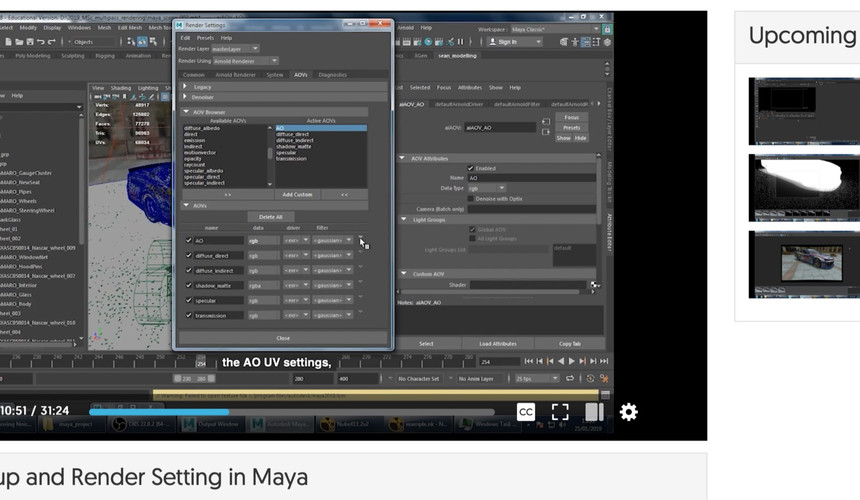
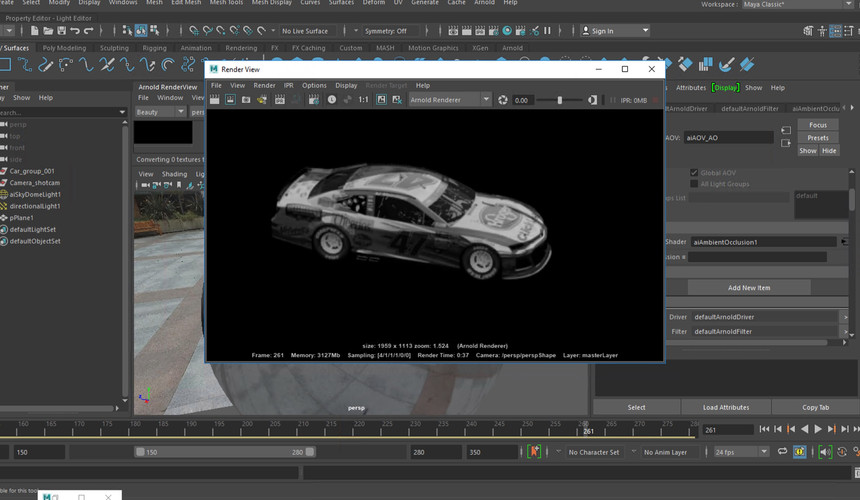
The first and main problem was finding out the I have no alpha channel, or it's not where it should be anyway.
My next task is trying to work through the video/tutorial without said ambient occlusion. This will be slightly tricky but, like all things difficult you have to perceiver.
At the moment my car is visible and that gave me a sense of false security because I know something's not quite right I just can't put my finger on it.
The 1st image is not mine, it is from the tutorial video.
The 2nd and 3rd are.


Problems and Issues:
Sang's Camera Tracking Example.
Sang's, is, of course perfect.
Mine on the other hand has a few issues...
My First pass at Camera Tracking.
The first being that there is no Ambient Occlusion. The second is that the ground spins towards the end of the tracking. I'm not sure why that is happening. I will endeavour to amend these issues and complete this project even if it kills me to do it.
Fixing my issues.
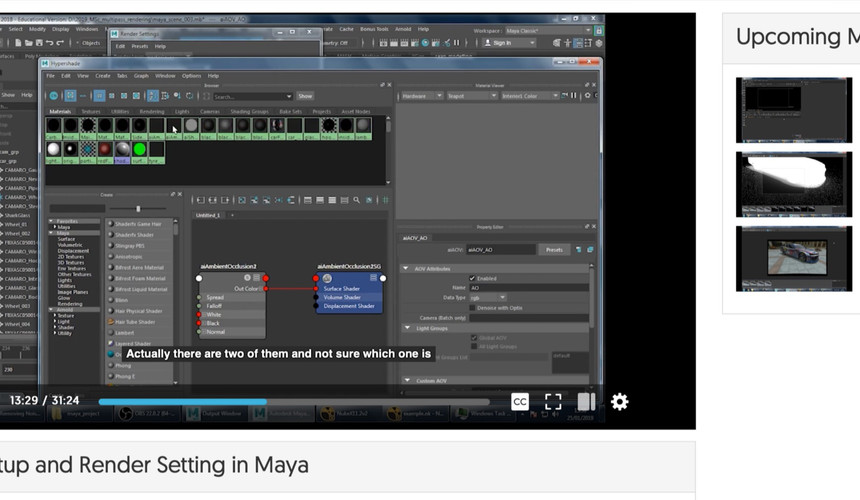
A. The Ambient Occlusion:
The Three Musketeers that became the

Dinamic duo.
These are the two files I need to find to complete my challenge.

Where are you?
The Final Workflow.

Notes:
So I never noticed this the other day, otherwise I would have been two days ahead of myself.
Small not that this was both a fun and hard project to accomplish. Lots of new things to learn and in a shot space of time.
But, I've liked the challenge and will defiantly attempt something like this again.
B. The Spinning Ground:
I trimmed out the floor spin. A bit of a cheat but, I am strapped for time.
The reason behind it was simply that I'd for got to hit the 1 key to see it in my view screen.
First pass at Camera Tracking.
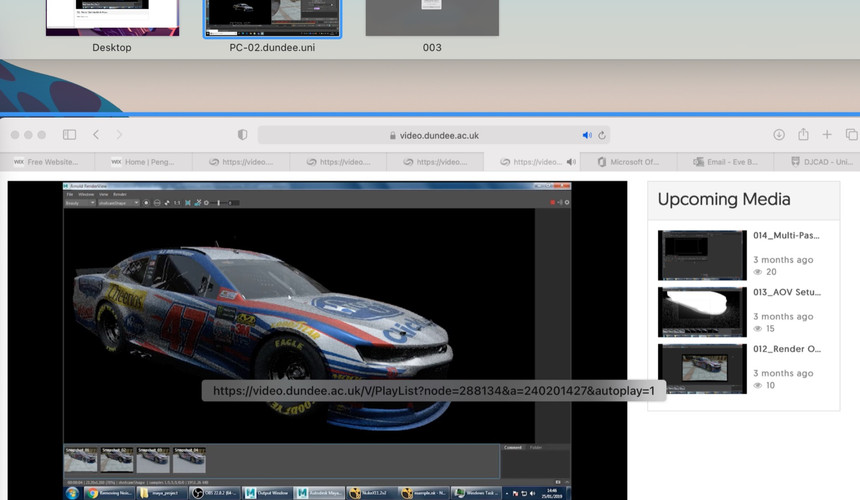
My Car.

I do like this first output even if it is still a little too shiny and glossy for a cross country sports or Nascar style vehicle.

Vs Sang's Car.

I like how his has a more metallic look to it and the colour is a little more muted and matt.
Truly frustrating.
Once again the connection has been interrupted.

Take your time
I've booked the computer
till
the
end
of
the
day.
Video of First Pass.
Second pass at Camera Tracking with everything fixed or as fixed as I can make it.

So the car on the left has has some colour correction and changes and the car on the right is the first pass.
It's funny how they look so different of the my screen and completely the same in the photo.
Video 2 and 3.
So in this version I have tried to colour colour correct the car but, that spilled over and caused some issues with the noise under the car.
In this one I tried to make the logos sharper and that seemed to make everything glossy and shinny once more. However, this does make the interior look a little sharper.
VICTORY IS MINE!
I have completed the task.
I have gone back the first and the original render.
What Can I say stick with the first one it is always the best version.
Shame about the shadow that dulls everything down but, at least there's no noise going on under the car.
Gallery:


Conclusions: May.
There are lots of conclusions I can come to from my time with camera tracking but, most of them aren't really about the camera tracking.
The first is that I would take notes. I would take more detailed notes about what I did. What I was supposed to be doing and how I was going to get there.
So next time I will keep a blog at the same time and not start one months later.
The second thing that I have learned to do is make sure that I save my files correctly so that they can be easily located whenever I need them.
The third is not to forget that I haven't finished the course the day before it's due to be submitted. That one I think will be the most useful when I get into semester 3 and for my own project.
If we are talking about the project then I must say I really did enjoy it and right up till videos: 13 and 14 everything was going fine and then all of a sudden it wasn't.
It happened that fast. I'm going to have to go back in and figure out where it all got so messed up.
While I was in either programs things seemed to be fine and it was only when I was trying to work with them both that I had issues and difficulties.
Let's see what else...
My memory is so bad when it comes to this project.
Oh yeah the materials and textures and the lighting.
That was really interesting to work with since I'd never done that before and it once again things went as planned accept for the rubber on the tires, that seemed to be missing from my prefixes in Maya.
UPDATED: July 2021.
2nd Conclusions.
I actually finished this. It may have taken about three months longer than I would have liked or time would allow but, as a personal victory I have completed the mission set back in January.
Time Flies when you have to Remote Desktop into another computer. Feel like I've been in a twilight zone.
The important thing to remember is that one day you will come out of the tunnel on the other side and if you are lucky you will have completed the task set before entering.
I do still have a few issues regarding the outcome.
There is some noise under the car and I think it has to do with my renders from Maya. You can see it here in this shot, slightly, but in the video it is more evident as it jumps about in motion.

The car is till very glossy and shinny. I feel like my eyes are messed up because I thought I was turning it matt when in fact I was making it even more reflective.
Finally finished my NukeX Camera Tracking Assignment.


Comments