Blastoff Project Blog (Semester 2: January - May 2021)
- eveb81
- Mar 2, 2021
- 20 min read
Updated: Aug 1, 2021

As I hadn't started this blog till March this year (2021) these notes will be from my memory and animation journal . I have done my best to recall key information however, these event's will not be 100%.
When this " * " icon appears I am writing from memory.
Pre-January/Post-December.
*
From semester 1's hand-in till new year my personal project seemed to be stuck in limbo. Limbo is a frightening place to be and not fun at all. Ideas came and went and nothing stuck. From experience I knew that this was a time where I would need try inspiration otherwise I'd have to scrap the whole idea and start again.
I don't remember much about this time over Christmas and new year other than the feeling of uneasiness and frustration until that is I was enjoying some down time with a slice of Yule log and movie when I stubbled across a film I'd seen in 2017.

That film was Boss Baby (2017). If you haven't seen this film it is worth a watch.
The main premise is about the impact a baby has on a tight knit family with Tim, being the older brother with a wildly imaginative imagination, seeing the baby as a threat to his existence.
This film is very entertaining, blurring the lines of reality and imagination with varying degrees off extremism.
Watching this movie set off not just one lightbulb but, several lightbulbs inside my head and suddenly everything changed. I could see clearly for the first time in months. The darkness parted and the light started to shine through.
Out the blue and all of a sudden;
My Astronaut turned into a speaker on a desk.

My launch room commander turned into a 12 year old boy with a passion for space aviation.

My NASA launch room turned from a study/office into futuristic science fiction command centre.

I knew where I was, where I was going and more importantly I knew how to get there.
Now came the task of getting it done.
(Below are stills from the scene that really spoke to me)
Boss Baby (2017)
Imagination.
Reality
The link between Imagination and reality.

There's such a clear change in appearance between the two realities in one shot.

I love the links in the movie between imagination and reality. They fit seamlessly into the story that they don't detract from the action, drama or emotion in any way but at the same time they ask the audience to question what they're seeing.
This scene from the movie that was the inspiration for the change in direction with my personal project.
Synopsis:
Tim pretends to be a space ranger on a mission to investigate an "alien invasion" which turns out to be his baby brother.
While all the elements are at work in the scene from the colour, lighting, action and acting it is in the camera action that most caught my eye. It cross sweeps around Tim which is often used in science fiction films and for me adds a sense of being off balance.
I think it was this one camera action that captivated me to pursing the new direction in my project. I think it looks amazing and I am intending to work with 3D Camera's going forward in my project.
Preliminary Camera Investigations:
January 2021.
As I hadn't started this blog till March this year (2021) these notes will be from my memory and animation journal . I have done my best to recall key information however, these event's will not be 100%.
When this " * " icon appears I am writing from memory.
With uni's semester 2 start date fast approaching I knew I didn't have much time to get myself prepared.
I started with simple interior designs of the office
Office Design Concepts:
Floor Plan 1:

Floor Plan 2:

Floor Plan 3:

Floor Plan 4:

Floor Plan 5:

I know I want there to be a distinct definition between the reality and imagination and I'm thinking about using light to illustrate that in a visual way. The room will have one wall as a picture window and a large opening for a doorway. When the room changes the window will black out and the door will close and a more fluorescent ambient light will take over and illuminate the room.
Before moving to designing the
Touch Table:

The desk in the room will turn into a touch table that is activated by either a thumb print or hand scanner as I know I don't want to use one activated by eye.
The table will also project a 3D hologram of the space ship for the lead character to interact with during the scene and panels on the desk will display easy to understand but incomprehensible data to show the audience when something goes right and also wrong.
and finally the
Display Screen:

The display screen will be mounted behind a large piece of artwork or a mural that drops down when the desk is activated. I like the idea of things that are hidden in plain sight and that can be used in multiple ways.
The plan going forward from now on is to get into Maya and start building my room. I plan do this in February with Monday and Wednesday as my Maya days. Tuesday and Friday's will be taken up with the VFX class and Going Live is still a mystery.
From March onwards I'll hopefully be able to move into After Effects and learn that so I can begin building my motion graphics side of things and depending one how quickly I learning it will decide the level of complexity in them.
I think it should be straight forward but, those words are always uttered by those who never plan for the worst. I may need a plan B at some point.
Original Journal Pages:
Pages 1 + 2:

Pages 3 + 4:

Pages 5 + 6:

Pages 7 + 8:

Pages 9 + 10:

Pages 11 + 12:

Page 13:

February 2021.
As I hadn't started this blog till March this year (2021) these notes will be from my memory and animation journal . I have done my best to recall key information however, these event's will not be 100%.
When this " * " icon appears I am writing from memory.
01.02.21 to 15.02.21
First day of Maya and it went really well. I learned how to save a project file properly and how to build three walls. It may have taken all day nevertheless, it was an accomplishment.
Wall and Picture Window Assets: 01.02.21

The table was created a week later on the 8.02.21
The Wall Tutorial:
I like this one a lot as it incorporated a few of the elements that I need for my project. Mainly glass, walls and light. The information about the reflections in the pool will also be helpful.
Picture Window Tutorial:
I found this tutorial very helpful in describing how to do a picture window. However, it doesn't explain how to add the glass so I will need to fins another example for that part.
The Table Tutorial:
While this tutorial is about creating a plank of wood I used it as a base model for my table top and then found other's that would help with the iron spokes and chunky iron legs.

Original Inspiration for the Table:

I really love this table design. The legs are reflective and the spokes will allow light to pass through them when in both spaces.
It looks Morden but, can fit in with a mid-century style.
I have substituted the wooden table top for a glass one which will light up in the imagination sequence.
Other useful links I found:
Maya:

The Maya tutorial that works best for me so far is this one through Game Dev academy. The whole course is broken down into manageable segments that are designed to educate you with bitesize chunks of understandable lessons in Maya. I will continue to watch and learn from these as the semester continues.
After Effects Tutorials to look at later:
These first two weeks with Maya seem to have flown in and I really like using the program. I still don't know too much about it but, for me it seems like a really user friendly program. I think once you boil everything down into simple geometric squares and maybe some other basic shapes then you can create anything.
Presentation Day.
16.02.21
Today was a long day. Everyone presented their projects. So many great ideas. So much talent and so many people doing so many things. I keep telling myself you can only learn as much as you can learn as fast as you can learn it, like this blog and Maya and Adobe. I mean it has been 7 years since I used any of these programs and they have changed so much in that time. Then there's the new ones that I've never heard of let alone used before. Zbrush, Blender and TV Paint. Thankfully I've heard of Nuke and seen it in action thanks to an old class mate from my uni degree. But again it's me learning it so I know it will take time.
I know I should stay on point but, I'm finding it it difficult.
So presentations. I'm always nervous when I present. I forget everything I want to say and fumble and stumble my way through everything. If it was me sitting there with someone else face to face with a coffee and cake it would be so much easier but it's not. It's online. It's avatars. It's silence. It's not looking into the eyes of the people you are presenting to and seeing a reaction.
The future of humanity worries me if this continues on too long. I mean it was going that way anyway but, in like 50 or 60 years. Then we would likely all be on line in our homes linking-in and maybe using VR headsets from our beds using AI's to get our shopping. (see I digress again). I must keep to topic if I can.
Well I did my presentation and got some really good feed back from he blinking lights. Our poor lectures, what silent hell must they be living in??
I'll wait for the feed back forms before making any changes.
I know I am ambitious. My idea is big for only a 90 second film. I wanted to do so much, learn so much. Maya first and then Adobe CC second.
Camera, lighting, modelling and Motion Graphics. But more than that I wanted to challenge myself. To see if I could actually do it.
My story is simple. Set in the imagination of a 11 year old boy in the 1950's - 60's with both a mid-century modern environment and a futuristic theme. See seems simple enough, right? Well all things seems simple in the beginning. It's really only once you get into things that you realise how hard they are and how much harder they are to get out of.
I still have time. If I manage it correctly. I still have time. Even if I don't get everything done at least I know I tried and in the end I will have new skills to work with and improve upon.
Mood Boards for the Project:


Detailed Concepts for the Room:
Everyday:

Science Fiction Style:

Script (1st Draft):

Character Development:

Well so far I have stuck to my schedule. I started building all my models in Maya on the 1st of Feb so that's going well. I have 4 walls, a picture window. I wall for the mural and one for the display screen. I also have a table top (that will be glass) and legs with a wire thin design. I'm quite proud of it since I only started using Maya in November. I'm so looking forward to the camera. I really want to use the camera and see if I can get some really dynamic angles of the room I'm creating but that will have to wait till I have finished creating the chairs and the other tables. Hopefully by the end of the month I will be further along.
Outcomes from the Feedback Forms:
The feedback forms from the class were largely positive when it came to assessing my project which was a bit of a relief since things had changed so much since the last time I'd presented them with something.
A lot attention the responses was about how well thought out the story and environment was. They also said that it was well researched, had a strong foundation and that it was presented clearly.
There was also a general concuss that the timescale might be too short and there would be an added challenge of creating the assets in Maya. It was also suggested that a storyboard and/or animatic would help with the pacing and visualisation of a fuller concept as well as the project being ambitious.
After reading the feedback forms I decided to let the information sink in for about a week before reading them again and then once more before the easter break. I always find that when I read feedback forms over several weeks different shards of information stick out and have different meanings to me and what is going on at the time and it can never hurt to read an open unbiased opinion about the project you are making.
March 2021.
As I hadn't started this blog till March this year (2021) these notes will be from my memory and animation journal . I have done my best to recall key information however, these event's will not be 100%.
When this " * " icon appears I am writing from memory.
Storyboard:
As this was the first full storyboard completed it was finally great to see the story come alive and get something concrete to work with. Since January the whole project has been coming together really quickly.
As you can see from the storyboard most of the action takes place in a home study or office where a small boy is hiding from his mother who is searching for him. While in the office he dreams that he is the saviour of a space launch that has suffered from some incident that has caused a failure in the mechanics on the shuttle.
The imagination part of the story is set in a very futuristic and science fiction based environment.

Scott, our hero, saves the day just before his mother catches him at his father's desk and his world is brought back down to earth and he realises that he might be in trouble as he knows he's not allowed to be in the room. His mother attempts to punish him before letting him off. She tells him that "no harm" has been done and the one day he'll be the real hero before going off to watch the real space launch.
Schematic for the Touch Table:

This is the final schematic that will hopefully be used in the animation.
The plan at present is to have it reduce down to twice over the course of Scott's attempts to find the workaround that will save the day.
Animatic:
Sound/Audio References:
In the animatic I used an actual recording from the Apollo 12 and 13 missions but, I had to edit the original to obtain the conversation that I needed.
Youtube Link: https://www.youtube.com/watch?v=IQJqAYTwx5g
I used the communications from the mission which are located from about 1 hour 16 minutes into the footage.
Although the audio isn't the best you can still hear the astronauts talking about the lightening strike and resulting difficulties that it caused plus the solution that was proposed by John Aaron.
After Effects Tests.
These were the very first tests that I did in After Effects. I wanted learn and understand the 3D Camera which I learned would also require using something called a Null Object.
I began by multiplying one solid layer to create about 6 different blue squares. I then placed them at different positions in the 3D space and set about adding different spacings and keyframes to see what I could come up with.
These tests proved to be quite successful for what I was hoping to achieve which was a simple introduction to After Effects, the 3D Camera and Null Objects.
*
It was around this time when I started to do tests and experiments for the Going Live project and like the poster from Semester 1 I thought I would use this time to experiment within After Effects in regards to the V&A logo. As I didn't have the official one I used a typeface text from a 1970's exhibition and a Vector source I found on Google Images.
After Effects Research:
V&A Test Logos:
This logo was made in After Effects with Glow Effects and Stroke fills. I found the tutorial to be really useful however, at my current level I was unable to adapt it for the V&A using their official files.
Youtube Link: https://www.youtube.com/watch?v=RIS86giOG-Q
This logo test was a chance to try trim paths as suggested to me by my tutor Kieran. The test really worked well and I also added a TV Flicker to another composition which can be found on the Going Live Blog. However, I can not find the tutorial on Youtube that I used so I am unable to repeat the outcome.
It has been good using the tutorials that I found on YouTube for After Effects but, unlike the ones I used for Maya I found them hard to adapt to my needs. Some things can be taken and used for other projects nevertheless, my knowledge isn't as extensive as I would like it to be and I fond when I tired adapting the techniques I got lost quickly.
Despite all the difficulties, the stress and the swearing at my computer I still see the benefits of the program. It is an incredible program that produces amazing results when you know how to use it. Sang provided a link to LinkedIn learning for NukeX and I started searching for classes on Adobe. Since then I have found a few that I really enjoyed watching and learning so I hope by the time it comes for me to work on my own Motion Graphics I can adapt it for my needs.
I found this course by Ian Robinson very helpful as he spends one of his videos talking about
how to manage files, assets and resources. Something which I was interested to learn more about as I am a neat and tide person both in real life and digitally and I was having trouble finding a YouTube video that explained exactly how mange all the work that is generated in After Effects and After Effects generates a lot of files.

Maya Work Recap:
It's been a while since I did any work on the room.
As I mentioned before the plan for this semester was to begin building the room in Maya from February onwards. So on February 1st I opened Maya at 8am in the morning and began building the walls and the picture window. I really wanted to make the room more rectangular than square with a hallway beyond the door as yet this has to be done. Next I built the touch table which might need to be resized when the other assets are introduced.
However, after the first two weeks in February the Going Live Project and VFX projects started to gain movement and momentum and my work had to take a back seat when I became the director of the project (more on that in the Going Live Blog)
Though my time as director was only for a week it seemed to interrupt my work pattern and flow and at this time I was becoming increasingly unwell and had to attend hospital appointments for my low iron and glucose levels which made me very lethargic and weak. These appointments have continued up till recently and now that my levels have stabilised I hope that my work production can increase to where it was at the beginning of Febuary.
Although this work was taxing and took time to accomplish I found it to be incredibly rewarding and really interesting. I never thought that I would enjoy working in Maya the way that I have or with Rigging (more on that in the Rigging Blog). Back in late November when I first opened Maya to start working on the Bobble Head project I found the program to be quite intimidating to begin with nevertheless, the more and more I've used it since February I've found that I am understanding it more and more.
Although I still put myself in the beginner category I am finding that I can fix my own problems, more and more as time goes on and rely less and less on help from my trusted friend Google and Sang at the university.
*
Maya Investigations
and
The Big Question:
Is my project even possible?
Again around this time I started to question some areas of my project. I've always been ambitions and people have always said that about my work so I wasn't really surprised when that came back in the feedback forms but, I remember thinking and it might have had something to do with the Going Live project that somewhere in the conversations rendering times came up and since I've never worked in Maya but, I am aware of rendering from when I studied my degree the first time and lots of people were losing all there files and computers were crashing left right and centre and it seemed like the end of the world back then that I didn't really understand how that side of things worked.
So I consulted with Sang regarding this very dilemma. I can't remember the exact date in March but I remember it was a Thursday. The most pressing question I asked was:
How long does it take to render a scene in Maya?
Little did I know just how much of a loaded question that was. You've heard of the face that launched a thousand ships well this was the question that lead to a 2 and half hour conversation. With the result being it depends on the scene and
How many assets are involved
How many lights
How many textures
How much geometry
How many scenes
etc. etc. etc
The list was endless but, the upshot was always the same. The more complex the scene the longer it takes to render.
I have a lot of lights in my story. At least 1 whole minute's worth and that alone might take weeks, if nothing goes wrong and by Sang's advice and some personal experience something always goes wrong.
It wasn't all negative through, Sang was really positive about the choices I'd made. The matt look and flat colours would speed up the rendering process and also having all the action take place in one room that changes into something else but, keeps the same geometric shape would also speed things up.
It was a lot to take in and digest and it took a few days of mulling over the weekend before I realised that while I am ambitious and ambition is all well and good but, I might just be a little bit too ambitious at this point in time.
New Direction:
After discussing this with Kieran the following week and trying to find a focus I started to list all the things that interest me when it comes to Animation and VFX.
Unfortunately for me this list is very long and I'm sure not limited to only these:
Research
Colour
Lighting
Camera
Environment
Matt Painting
Layout
Editing
and now Rigging.
I really have come to love rigging its very systematic and methodical and that plays right into my wheelhouse. You can read more about rigging on the rigging blog.
So from this long list I had to narrow it down and find some focus. I needed to find what I loved more than liked.
Editing and Camera work will always come high on the list. I always notice them first when I watch films, animations and TV shows.
As it turns out all my loves followed the yellow brick road to Layout.
Layout:
Notes about Layout
"Layout is the art of staging an animated scene in relationship to the camera"
Layout is about composting pictures and understanding the 3D space in film. You need an to understand; story, acting, sets, characters, props and timing. You need work fast and build shots quickly. It helps to have an interest in editing and a knowledge of film.
Mostly Layout is all about the camera and how everything within the scene relates to it.
20.03.21
A few days after the Presentations James contacted me about doing some concept drawings for my project. This was serendipitous as I was going to contact him about helping him with his project.
(Side note: More can be found on that project in the other blog post titled "Collaboration")
But back to this project and I can't wait to get started with moving onto the next stages. Storyboarding, Animatics and Concept Art. Some more development with the table in the futuristic scene and getting those mid-century styles and colours set for going forward into semester 3.
Character development notes and ideas for James.
James will be working on this for semester 3 and I will catch up with him after the birth of his son.

The idea behind the look of Scott, the lead little boy is somewhere between Denis and Kurt Russell from when he was a child actor in the America TV show The Fugitive which ran from 1963 - 66.
I wanted a little boy that was the quintessential all America child that looked innocent but had a sense of mischief about him.


The character of Scott will be based around John Aaron the Chief EECOM officer at NASA who saved the during the Apollo 12 mission from a lightening strike shortly after take off.
It was his detailed knowledge of the space ship and quick thinking that earned him the nickname: steely eyed missile man.
Concept Art Inspiration:
When James asked me about my inspiration for the project, during one of our chats, I didn't really have an answer. So I went back over my Pinterest board for the project and not only did one image keep popping up but the same artist too.
That artist was Andy Burgess.
At the time I didn't know much about him so I did one of the things I love to do best and went off to research him and his work.
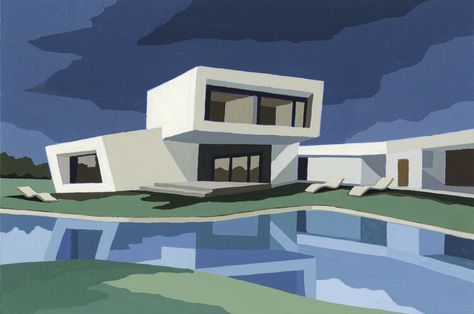
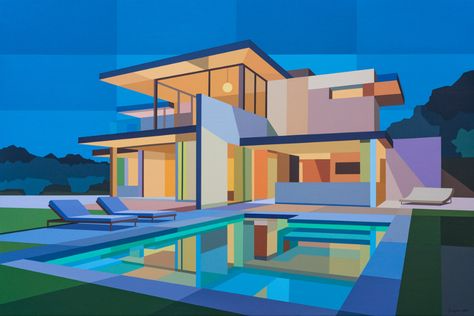
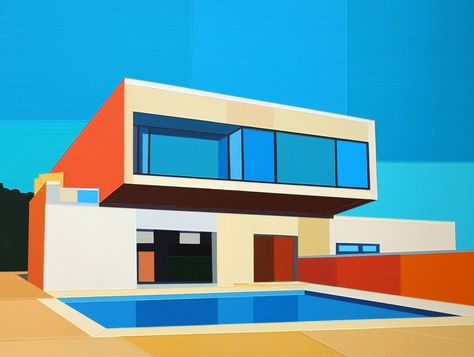
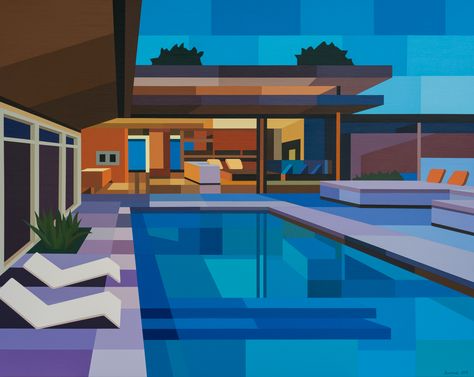
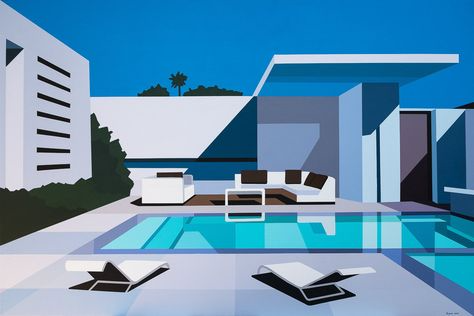
Andy Burgess is a London born artist living in the Arizona desert. He paints mid-century modernist "mosaic" style collages and city scapes.
You can find out more on the artist with this link:
Andy Burgess: https://www.andyburgessart.com/about
A selection of Andy Burgess' work.
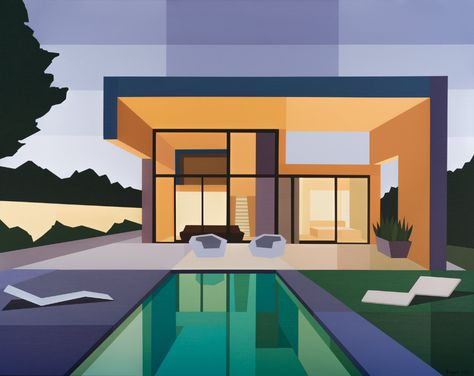
Similar work with a softer edge to it.
One painting two ways:
This was the painting that I'd found repeatedly pinned to my Pinterest board.
Stahl House VIII, 2018
Acrylic on canvas, 45 x 60 inches

This is the original art work and the two below have slight differences. But with this one I love so much about it I hardly know where to begin.
I love the colours, the solid shapes, the mosaic style, the harsh sharpness and the sold blockiness, even the pool looks uninviting and yet there's a welcoming warmth to it.
The three soft edged objects break up the harshness and make it seem not so uncomfortable after all and the blue of the pool doesn't feel cold.
These are similar versions of the main image with subtle differences and they don't seem to capture the feeling in quite the same way. I suppose it is because these are more muted or matte like in texture where as the other one has a bright sharpness to it and some of this well placed softer edge items are missing.


Graphic Styles to Consider:

I love this image.
Cinema 4D is brilliant at getting that harsh Californian sun just right. I'm not sure if it was used in the creation of the other two images but, I know it was in this first one. It's so sharp it cuts like a samurai sword.
I love the simple directness and limited colour palette of the one on the left and the graphic advertisement style of the one on the right.


22.03.21
I've decided to update this blog on Monday's, for now anyway, it's easier than on Friday's. When it gets to Friday's I have no more energy left and all I want to do is watch the Friday night film in peace. So Monday it is.
The week was long and frustrating. Mostly because work has slowed on my project to a dead stop. Well I feel like I haven't done anything. I have started watching the linked in lessons on Nuke, After Effects and Maya. So that's a good thing but, then these lessons take a while and I have to concentrate on them. Watch them and then learn from them.
Time is picking up now. We are already closing in to the end of the month. As I always say once we are in March its closer to the end of the year and summer is never long enough.
As they say; "lost time is never found again"
Now that the Going Live project has started to ramp up I doubt that I will be able to spend as much time as I would like on my own project. However, that won't be such a bad things since the Going Live project is so interesting and exciting.
11.03.21
Initial Chair Reference:

Chair Concepts:
Final Considerations:


Colour Concept Art:


11.03.21
This last week has been as tough as the last and progress is slow, glacially slow. I don't know why I can't stay focused? Why I'm so tired all the time? I guess things are catching up with me nevertheless, I keep going because it's all I can do.
I hope these posts start to become more focused however, for now this will have to suffice. I keep watching the lessons on Linked-In and the tutorials on YouTube for After Effects and it is like learning more than a new a new language. It's like learning another language with a new language. One day I know I'll start speaking it fluently though right now all I can say is "good morning" and "goodnight" maybe a "hello" and "goodbye". I hope that soon, before long, I know it I'll be asking "where the library and bakery" is.
28.03.21
Nothing much has happened on my own personnel project this week since I've been spending all my time rotoscoping for the Going Live project. I have slightly altered the project since I doubt I'll have time to make a full animation in the time that I have left to complete it so I will be focusing mostly on Layout and Camera. I hope that I can hone my skills in this area as it is an area that I am most interested in. I will still be producing the environment and sticking with the same story but I will focus on shots and camera movements. So not much to report on progress but a lot to report in changes and alterations. Till next time where I hope to have more physical work completed.
13.04.21
Again I haven't done a lot of work on my own personal project. The rigging is taking up a lot of my time, the thumbs are killing me and they turned out so well the first time.
26.04.21
What I will be focusing on in Semester 3:
It now my intention to take one long section of the animatic or two smaller sections of the animatic and develop them for layout, camera and lighting.
I am also interested in doing some modelling and more Rigging in Maya so the plan is to make the assets for the project I proposed and use them for my Layout designs.
To achieve this goal I will be using the online resources from the LinkedIn learning as well as Youtube, Maya and my trusted friend Google as well as some literature that I've ordered from the university library.
Books:


I will also be keeping a much more up to date blog as well. I never realised how bad my memory was till I had to use it.
Proposed Production Schedule for Project:

The Asset List:

The Shot List:











Hey Eve, interesting to read about how you're getting on so far. Totally feel your pain and frustration at having to learn so many new software's after having been out of education for a number of years (I graduated way back in 2005 and was useless at tech back then lol), it's definitely a struggle but you will get there - just keep persevering and chipping away at your plan. My gran's favourite saying was 'little and often' which I now have in the format of a wooden sign hanging in my office/studio and try my best to adhere to. Your research is fantastic and you have some great ideas and I'm delighted to be involved creatively with some of…