Maya Model Rigging (March to May 2021)
- eveb81
- May 9, 2021
- 12 min read
Updated: May 12, 2021
Rigging A Bobble Head.
Brendan Model:

Just to be clear I did not make this model.
The model was provided by Sang-Hun Yu at the VFX department at the University of Dundee.
I have only added a Rig to the model.
1. Spine and Joint Setup

Task:
Build a spine up to the head_end
Result:
Starting on the side view, which shows the best way to line up the spine joints I lined up the spine and joined them into one chain.
Though simple enough further down the line I needed up with an extra joint in my spine that caused a few issues regarding my clavicle joints and shoulder joints. But more about that later down the pipeline.
At the time this was created I thought that if I took it one step at a time I'd be ok but, this was only the first video and at this time I was doing well. I knew that there would be issues further down the line and that building the rig would get more and more complicated as I went through each one.
What I gained from this video:
How to set up the spine joints and how to set up a new shelf for custom tools.
Gallery.
2. Leg Joint Setup
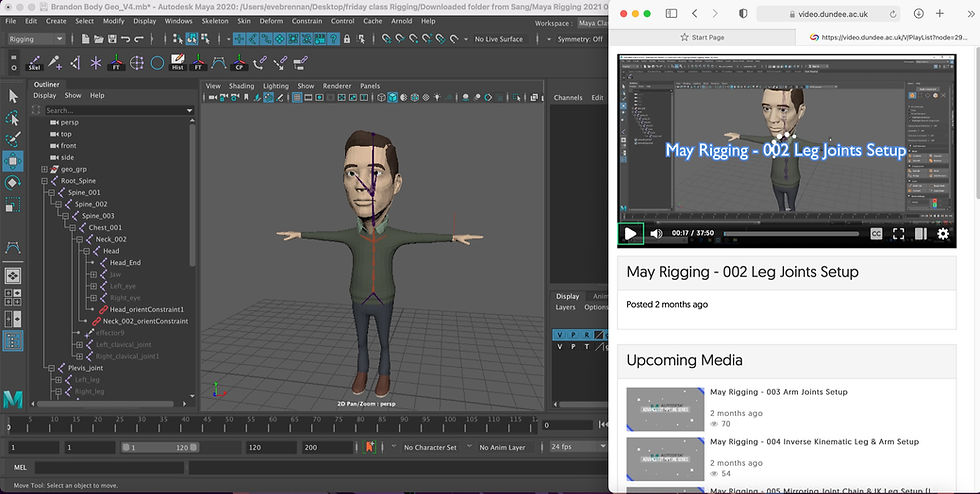
Task:
Build a leg joint to the toe_end for the left side which will be mirrored later to the right side.
Result:
The first attempt at this went as smoothly or so I thought.
Again, like with the spine joints there was a problem with the knee. I hadn't added enough definition which showed the IK which direction to move in. Sometimes this works and sometimes it doesn't. For me it didn't and required the whole leg needing to be redone.
Which ironically worked out better than the first and it was really good to get another shot at it so I could not only improve but, fix the problem.
Leg Joint before the IK Handle was added.

Leg Joint after the IK Handle was added.
I now have chicken legs, great for modelling chickens and other birds but, not for humans.
While in a static pose the knee joint looks ok when I tried out it flips backwards and goes the wrong way.
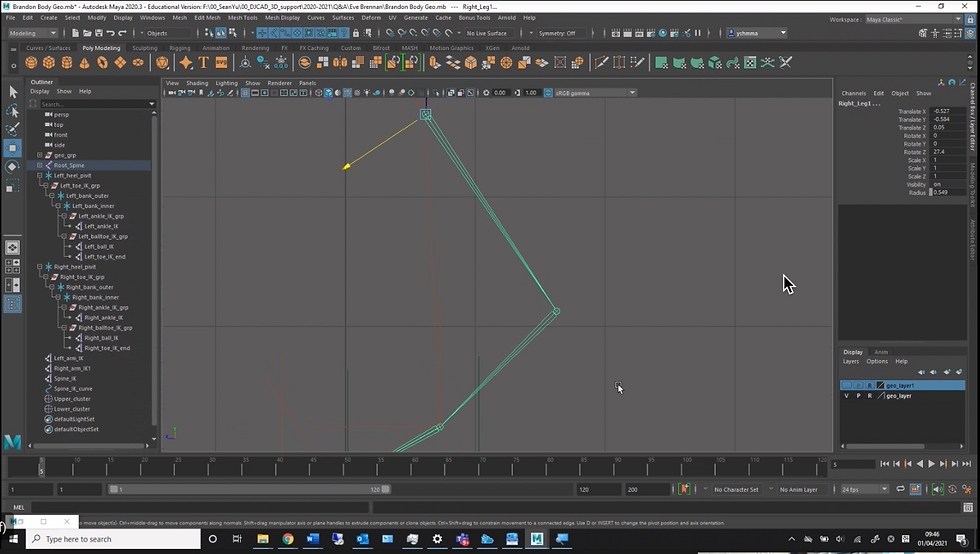
New Leg Joint.

The joint has more directional identity which helps the IK Handle understand the right way I want it to move. It is advisable to add a small directional indication to your initial joints in order to save time and problems later on if you miss it.
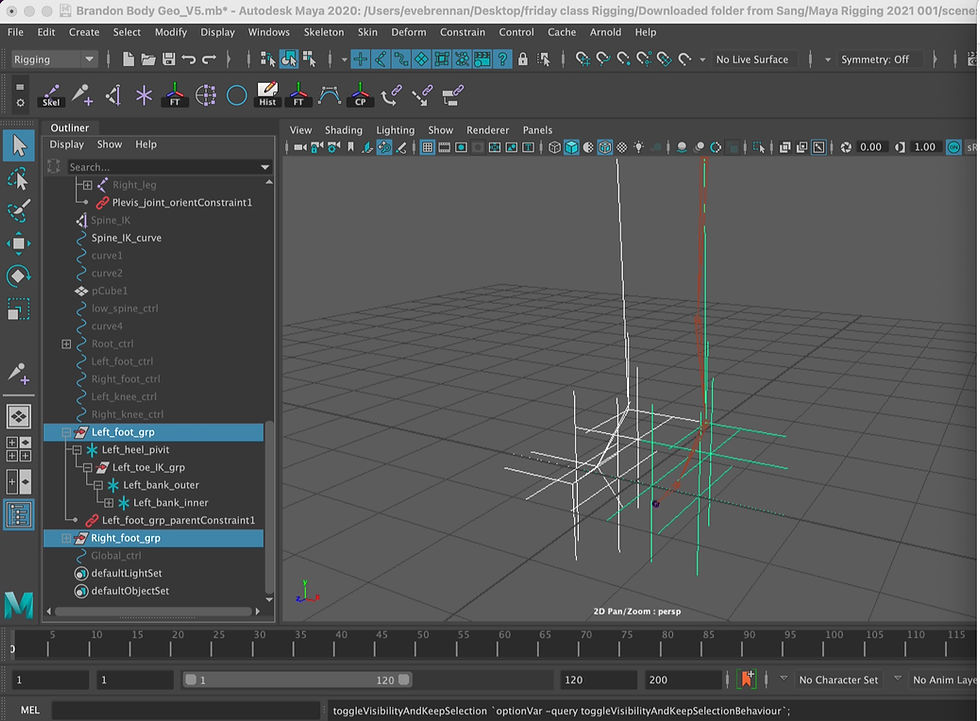
This image shows the IK Handle facing the right way after redoing the leg and feet joints.
I started again by deleting the original "chicken leg" IK Handle from the pelvic joint to the ankle and keep the ankle to the toe_end. Quickly I decided to delete the whole leg up to the toe_end and start over.
After I deleted the whole lot I started again from the hip joint to the toe_end the process went really fast, as fast as it did the first time with only a sublet difference in the knee.
What I gained from this video:
That you should always try to add definition to joints like knees and I'm guessing elbows, if the IK Handle is to understand which way you'd like it to move in the right direction. A mistake I'm sure I'll not be making again.
3. Arm Joint Setup

Task:
Build the shoulder, arm joint, fingers and thumb for the left side.
Result:
Once more the first time I did this it went quite soothly, as with the leg, which is a little disconcerting.
Small Side Note:
At this time I had no idea my legs' IK Handle was going to give me "chicken legs" as I hadn't got that far quite yet so I was blissfully unaware of what was waiting further down the road.
Back to a time where I was unaware of these things.
I built the left arm from the shoulder to the wrist. The four fingers and the thumb joints quickly and without issues and moved onto video 4.
What I gained from this video:
How to set up joints from the shoulder to the wrist and the finger and thumb joints.
Side Notes from further along the rigging road: (April 2020)
A few videos later on while working on the rig that I found out that I had an extra joint in my spine which needed to be removed. From their the clavicle and shoulder needed to be reconnected and this had an adverse effect on my arms and hands.
Everything seemed to flip/invert. As with the leg the only course of direct action was to begin again. However, unlike the leg where time was no issue the situation was different now. This problem with the arms and hands happened about two weeks before the hand in.
I really had to make a move and pick up the pace.
The second time I did the arm and four fingers it went smoothly as the first but, the thumb was proving to be an issues. it did not go as smoothly as the first time.
I think because I was overthinking and stressing out too much. After a quick consultation with Sang at the uni I felt a little more confident and tackled it from a place of clarity and calmness.
With clear focus I was able to replicate the thumb joint once more.
What I gained from this video:
Another chance to do the thumb joint again.
Overall Gallery.
Thumb Gallery
4. Inverse Kinematic Leg and Arm Setup

Task:
Add IK Handles for joint chain Legs and Arms.
Result:
The first and second pass of this worked really well on the arm but, not the leg. Once I noticed this I simply deleted the joint and from the leg and redid it with that added directional indication on the knee which solved the problem easily.
The only reason I had do the arms again was because my thumbs flipped somewhere along the process.
What I gained from this video:
Not to grab the controller after you've created it before adding controllers because it is really hard to put back into its original position and to put the directional indication into knee and arms to give the IK Handle an idea of where I want it to go.
Gallery.
5.Mirroring Joint Chain and IK Leg Setup

Task:
Mirror the joint chain and IK Leg setup
Result:
When mirroring the joint chain it helps to select the joints in groups. So Arms should be separate from the leg. It only takes a few moments longer but, it keeps everything organised and simplified.
Simplified works for me. Also XY is orientation for this movement.
What I gained from this video:
When mirroring joint chains you can use the prefix of "L_" or "Left_" as I used and change them to "Right". It also helps if you disconnect or un-parent the shoulder from the clavicle and then mirror the joint chain. Basically make sure that the chain you are mirroring is independent of the main joint chain.
Gallery.
IK Arm Setup Issues:


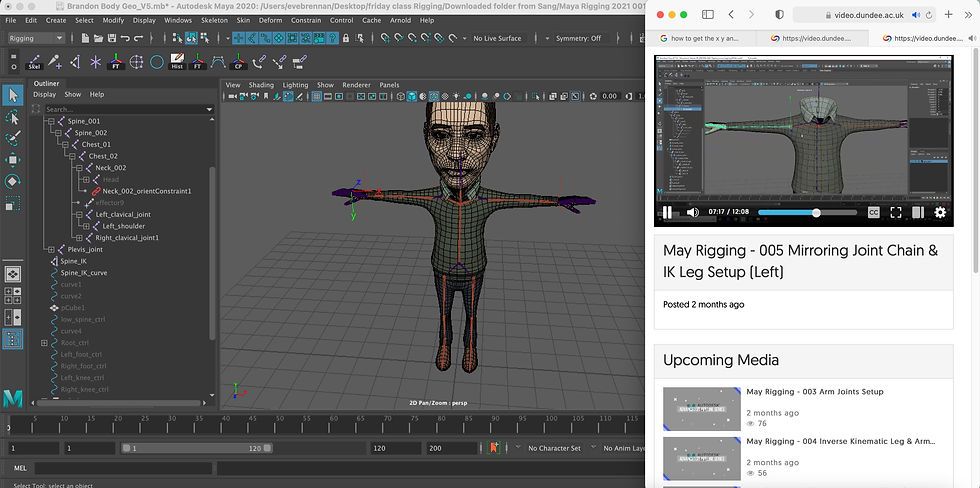
Images that represent the mirrored Arm and Arm IK Handle reconnected to the spine and clavicle joints.
IK Leg Corrections:
Mirrored leg rejoined to the pelvis.


6. IK Spine Setup
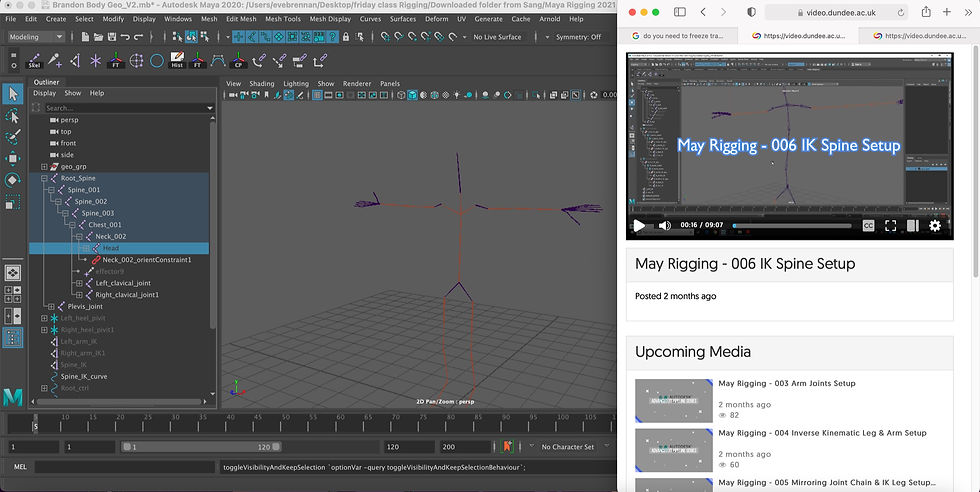
Task:
To set up the IK Spine
Result:
Not much to talk about in this post. The IK Spine setup worked beautifully and gave me no issues, problems or complaints.
What I gained from this video:
That splitting up spine into two clusters which gives two areas for the torso to relate to like a regular body. With a cluster for the chest and a cluster for the waist.
I also gained more knowledge about how to use the features when pressing the right mouse button. As I said before I would put my knowledge of Maya at the beginner level so every new control or feature or procedure that is mentioned I do try and learn as much as I can about it.
Gallery.
7. Facial Joint Setup

Task:
Facial joint setup
Result:
To place the joints in the face. The jaw and the eyes. Simple to add joints into the model by using the geometry. Center point the joint to the eyeball.
Just make sure that you name everything properly and keep the higher archery clean and tide.
What I gained from this video:
To set up the joints in the head and the eyes.
Gallery.
8. IK Spine Control Setup

Task:
IK Spine control setup
Result:
I felt that when I first did this video things had gone well. However, a lot of my problems were flagged during the first skin-bind that led back to this video. After a rewatch and a little more focus I was able fix the issues and problems quickly in order to do a second skin-bind.
What I gained from this video:
To double check my torso higherarchy because it the higher archery is out then the skin-bind is too.
Gallery.
(I don't have any images from this video and these were sourced from other locations)
9. Face Controller Setup

Task:
Face Controller Setup.
Result:
Set the head controller and group it. Rename it and freeze transform.
What I gained from this video:
Setting up the head controller. This process went really well and quickly and in the end at the skin-bind there were no issues flagged up.
Gallery.
10. IK Arm Controller Setup

Task:
Set up the IK Arm Controller
Result:
The first time I did this it went really smoothly. I had no issues, concerns or problems.
The second time I did this things didn't go as well as the first time. Even with my limited experience in Maya even I know that when a red bar flashes at the bottom of the screen you know somethings gone wrong.
Issues:

While trying to add the orient constrain this red bar flashed up and refused to work for me.
After a little investigation I realised that I had missed a step. Correcting this allowed me to finish off the task and complete the video.
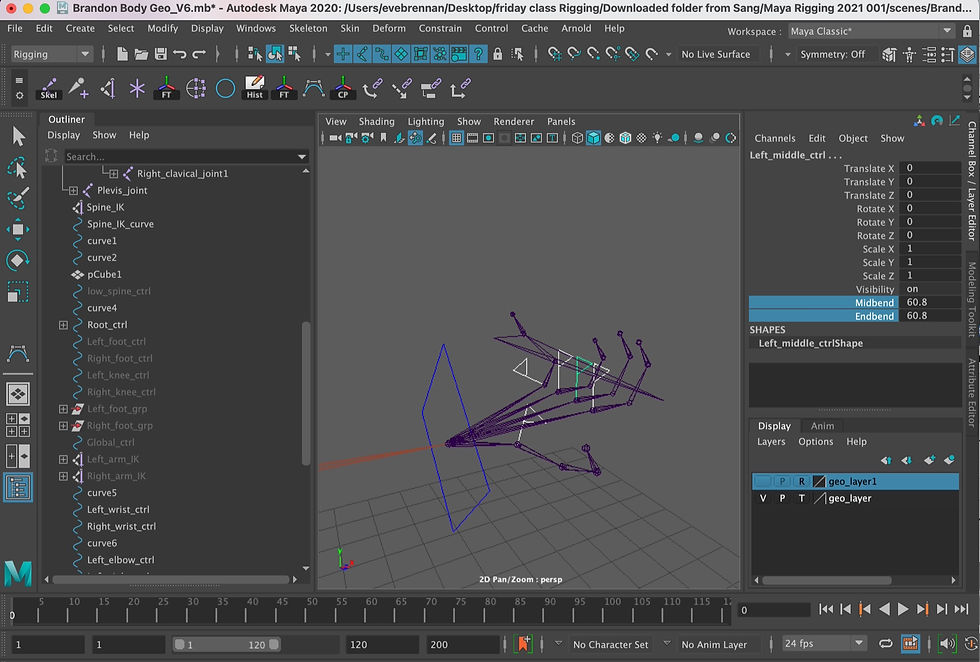
When I was adding the Mid and End bends to the left hand this happened to the pinky. Which I found strange as the right one didn't present with the same issue.
The finger joint was bending in the correct direction it was the joint its self which was going weird. All I did was delate the joint and reconnect the Mid and End bend.

After deleting out the pinky joint and replacing it with a new one I matched up the translate values with a + for the left. This should make the joints mirror images of one another.

The only one to have any concern with now is the right thumb. The flag points in the wrong direction but the joint itself moves correctly. I don't know if this will cause issues or problems later. However, it is something I can not fix at present so I will have to consult with Sang once more.
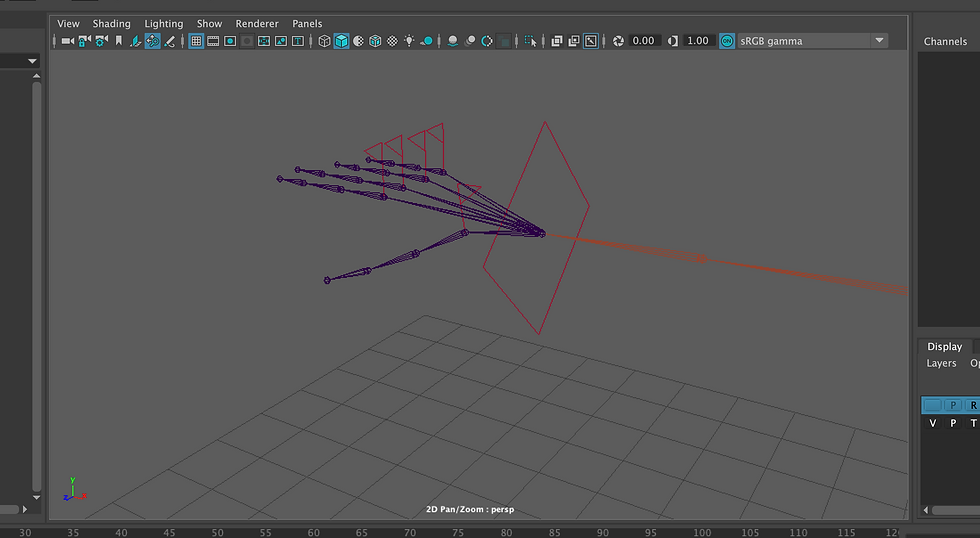
The right hand fingers and thumb.

What I gained from this video:
To take my time and be precise. To make sure that everything that I'm doing is clear to me and the reasons behind what this will lead to and what I've learned so far will help me solve my own problems in the future.
I also learned to undo after every test movement as reverting back to the T-pose is vital in rigging along with keeping everything zeroed out.
Gallery
Part 1:
Part 2:
11. Foot Controller Setup

Task:
To set up the foot controller
Result:
Foot Controller Problems:
As you can see from the video there were a few issues with the Foot Controller setup.
The foot roll on the left and right foot
The Toe Twist seemed off and
The Heel Twist did not work on the left foot
Videos:
The issues with the foot controller were simple and easy to solve with a second look at them.
Foot Controller Solutions:
Foot roll on the left and right foot = connecting the CP to the toe_end
The Toe Twist seemed off = reseting the value once more
The Heel Twist did not work on the left foot = reseting the value
Second Pass of Foot Controller Setup.
What I gained from this video:
Make sure to snap the centre point to the joint.
How to set keys for the: foot roll, foot twist, heel twist toe-tap and foot bank (left and right sides).
Gallery.
12. Finalising Foot Controller Setup & Global Controller Setup
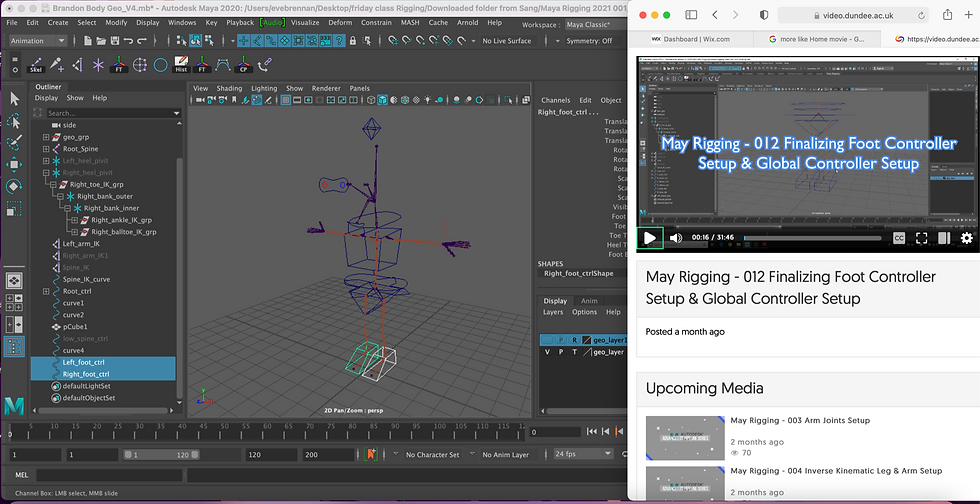
Task:
To finalise the Foot and set Global Controllers
Result:
The heel pivot was highlighted in this video and I'd sort of forgotten about it up till now. So following the video and creating a group for it was the next task. Again, you must centre the point by using "D" and "V" key. I didn't manage to get this done the first time but, the second time it snapped on easily enough before parenting it with the maintain offset "on". Then I repeated the process on the right side.
We also set up knee controllers.
The Global Controller: Center pivot the controller and then sap to the centre of the world. You and gauge where at this point later we will be perfectly aliening it. Freeze transform and then rename. You can remove the history too but, there shouldn't be any at this point. Still a good habit to do it though. Then build the higherarcy. No constraint needed.
What I gained from this video:
The knowledge to set up the foot controller, the knee controller and the global controller.
Gallery 1.
Gallery 2.
13. Finalising the Controllers Setup

Task:
Finalising all the controllers.
Result:
In this video we needed to add controllers for the clavicle. This must have been missed or it was placed in this video due to being edited out of another one. It wasn't a big deal again fairly understandable and easy to do.
It's quiet fun developing all the different controllers for the areas of the body. I also made sure that the left and right side of the body had different colours. So Blue for the Left and Red for the Right.
This was also the place where we set up the key's that we only wanted an animator to see. I remember now that I'm writing this that when I redid my thumbs I un-hid some of these keys. I must remember to go back in and re-hide them (but, I know what my memory is like so I'm convinced I will forget to do this.)
What I gained from this video:
How to set up the clviccl controller and set the keys for animators.
Also FK's like Jaw controls are rotation only and IK's are translate and rotation because they are things like the wrists and ankles. Makes sense.
Gallery.
14. "Select All" Script Setup
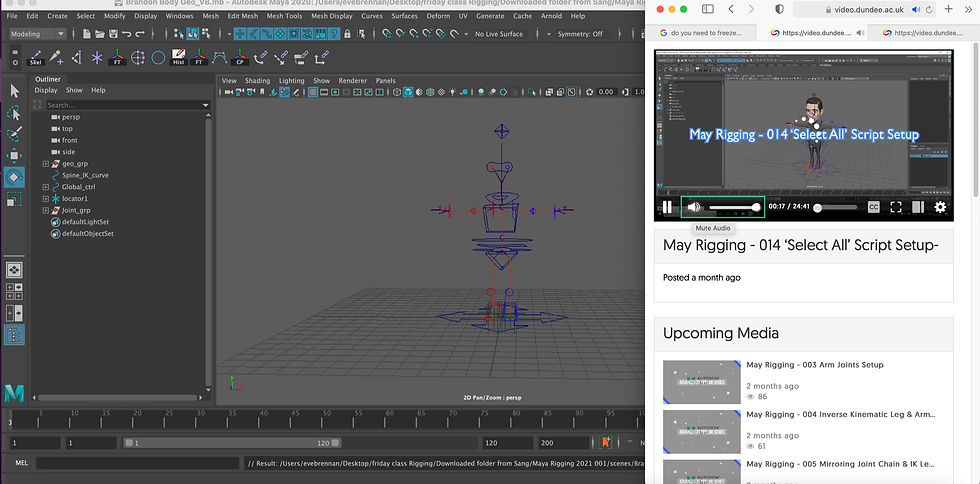
Task:
Script setup, Bind-Skin and Global Controller.
Result:
Selecting the joints for binding them to the skin. I did this twice. The first time I did this it showed me where some of the things I'd been doing hadn't worked. Things like the torso and the hands.
Simple to fix. Go back and figure where I went wrong and correct the mistake and move back into skin-binding. It was never going to work the first time but, it was good to get another shot at it to improve my skills.
Once everything is selected you have to go to the create option, sets, quick select sets. Name the set: Bind Joint Set and add to outliner.
Next select the whole Model and the set and bind under Rigging.
Skin, Bind Skin option box.
Rest the box.
Bind too: Selected Joints, Geodesic Voxel, distance, set to "3" and Save under a different name.
click "BIND SKIN"
Global Controller: (Hide the Spine curve) Select from the viewport "none", now select "nurses curves" and select everything but, not the global controller. Select that after.
Select the Script editor (very bottom right on the Maya screen):
Clear the history from the edit menu. Select the controls and then the global and select the script and middle mouse click to the shelf editor and click "MEL"
What I gained from this video:
Don't bind end joints because they are end joints.
Don't use the orient constraint on the eyes before you skin-bind.
Breakdown 1st and 2nd Pass of Skin Bind:
Body.
Legs and Feet.
Arms, Hands and Shoulders.
Head.
Gallery.
Global Reset Gallery.
Conclusions
First Notes:
Video's 1 - 14.
If I had to do this all over again I would defiantly keep the blog at the same time as doing the videos. I would keep a chronological archive of the steps that I did, the progress I made and the issues that arose when they arose as opposed to thinking back and trying to remember when and where things went wrong.
For example; when I had issues with the chicken legs, the extra shoulder joint, arms and hands which were easy to fix and allowed me a second chance at the process which improved my skill despite taking extra time.
The only area I truly struggled with, more than once up to Video 12, was the thumb joint. As I've said the first time I built the left hand I had no problems and it worked really well. Then as I went further into building the Rig I discovered a small problem with my spine joints. There was an extra one that needed to be removed and due to this the hands filliped over or inverted.
Having no idea when or where this happened I had no choice but to re-do my arms and hands, about two weeks before the hand in, which wasn't an ideal scenario but, overall it went as smoothly as the first attempt with the exception of the thumb.
It took about three days to do the thumb the third time round. Sang always said the thumb joint was one of the most difficult parts when building a skeleton rig and because I didn't have any issues first time round I wasn't aware of the difficulties that it could present.
The result of this issues has given me a real experience in dealing with thumb joints. I'm sure that next time I have to do something similar I'll be capable of dealing with it more confidently.
Overall conclusions so far:
I have really enjoyed Rigging and I'd like to do it again. I'd like to see how far I can get with what I've learned over the last few months by building another rig. I think by doing another one I'd see how much I have learned and what I still need to improve. I imagine that every Rig has its own special demands. Human's will be different from animals and specialised characters will probably have individualised/personalised Riggs to suit the needs of the animator.
Rigging was something that I wasn't expecting to like as I thought I would find it too complicated to understand however, that wasn't the case. I was always going to struggle with some things and make a few mistakes but, all the mistakes I did make helped me improve my knowledge and skills. Overall the mistakes that were made were quickly solved.
Despite all the challenges, issues and problems it was really rewarding when I finally connected up and watched all the joints moving around with my model.
15. Biding and Weight Painting
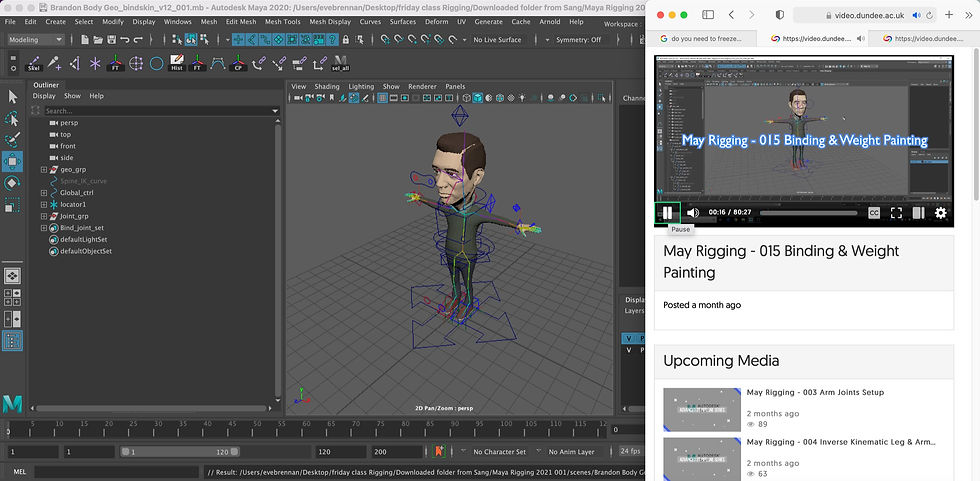
Task:
Result:
What I gained from this video:
Gallery.
16. Blend Shape Basics
Images
Task:
Result:
What I gained from this video:
Gallery.
17. Autodesk Mud-box Intro
Images
Task:
Result:
What I gained from this video:
Gallery.
18. Creating BlendShape in Mud-box
Images
Task:
Result:
What I gained from this video:
Gallery.
19. Exporting BlendShapes to Maya
Images
Task:
Result:
What I gained from this video:
Gallery.
Second Conclusion notes:
Video's 15 - 19.


Comments