Soda-Can Project. (Due December 2020 Completed July 2021)
- eveb81
- Jul 27, 2021
- 8 min read
Soda-Can Maya Model Challenge.
Blinged Up Style.
For Reference purposes only!

Final Rendered Images:
What I produced.


Example of what I hoped to produce.

What I have actually achieved with Maya AI Arnold

Simply shot in Maya with 3 point lighting.

Still shot in Maya with 3 point lighting but, I've played about with the levels with the hope of achieving a slightly more realistic look.

Let's get a behind the scenes look at this project.
Watch out for the "cool" bonus martial at the end.
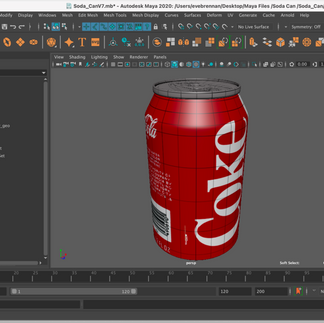
Video 1: Maya Soda-Can Modelling Preparation.

The point of this project is to increase my knowledge of the Maya modelling toolkit.
Project Files.
Front View.

Top View.

Un-wrapped.

These three images will help me make the 3D model of the soda-can. First task is to bring in the references and set them up.


Next task is to bring in a cylinder and lock the reference images into place.

So far so good. It's all going to plan right now.
Image Gallery.


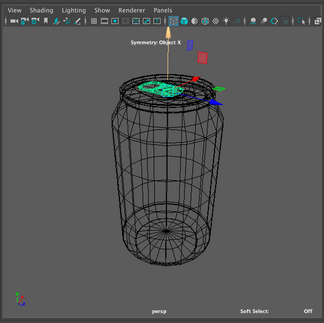
Video 2: Soda-Can Body Shape Blocking Out.

Now its time to block out the body of the Soda-can.


Making sure that there are no hidden surprises.

So far nothing out of what should be happening is happening.
Now it's time to move on to the next phase of the model the top and bottom of the can.


It's looking good but, I can't help but notice that somethings not sitting quite right on the top part of the can.
Problems and Issues.


On a closer inspection I've noticed this and I'm not too sure where it came from. It is strange and very odd. I keep hoping that it won't be a big problem or cause issues later on however, I know I'm deluding myself. This will not be easy to fix or go away by it's self.
This was a complete sucker punch to my confidence.
Notes.

What happened here?
What the hell is this? and
Where the hell did it come from?
How do I fix it? and
How do I stop it from happening again?
Image Gallery.


Video 3: Refining Soda-Can Body Shape.

Moving on for now to get on with the rest of the model made.
Top.


Bottom.


Well now this is looking good at least. Even if it won't be seen in the final output.
Gallery.


Video 4: Adding Soda-Can Top Details.

Now it's time to go back to the top.
Not too bad for a start, it's looking good, at the moment.


However, that little problem from before is still around and I think it's only going to get bigger.


What do I do about this and how can I fix it?
Gallery.


Video 5: Modelling Soda-Can Ring.

Most of the issues with this video came from previous situations from past moves and problems that I created during my own building of the model. Nevertheless, by the end of this video tutorial I had succeeded in making the three pieces that make the model.
Now that I think back to the first time I attempted this tutorial I remember that it was the very first thing I tired in Maya and it took three weeks to get this far and today it has taken me x2 days.
Which is a great improvement in my opinion. To go from three weeks to two days. That too me is an improvement.


Issues and Problems.

This problem will not be going away any time soon and I'm a little worried that I may have to start again.
But, I wonder without knowing how or why it came into being would I not make the same mistake again and is it better not to know how to fix the problems that arise over simply beginning again over and over again.
This was how it looked around the end of video two and this is where I wish I'd dealt with it. But now I have to deal with the above one which has since metastasised beyond a small node. Mistakes in Maya become cancers and that might sound extreme nevertheless, you can see how things have evolved from this one little issue.


Video on fixing the problem.
Gallery.


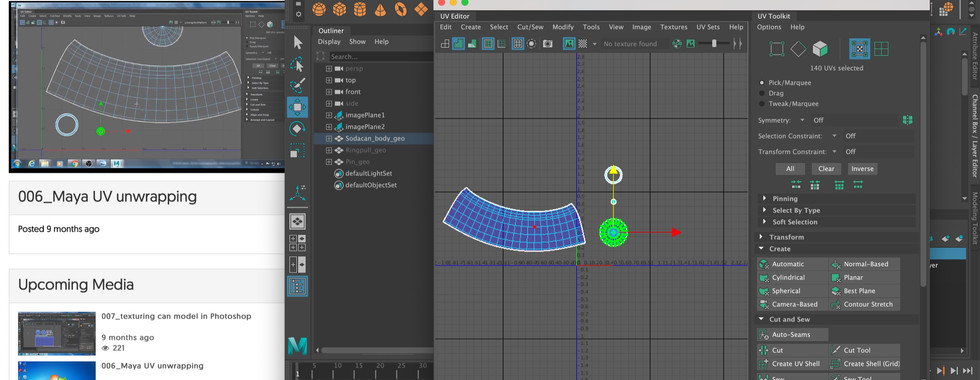
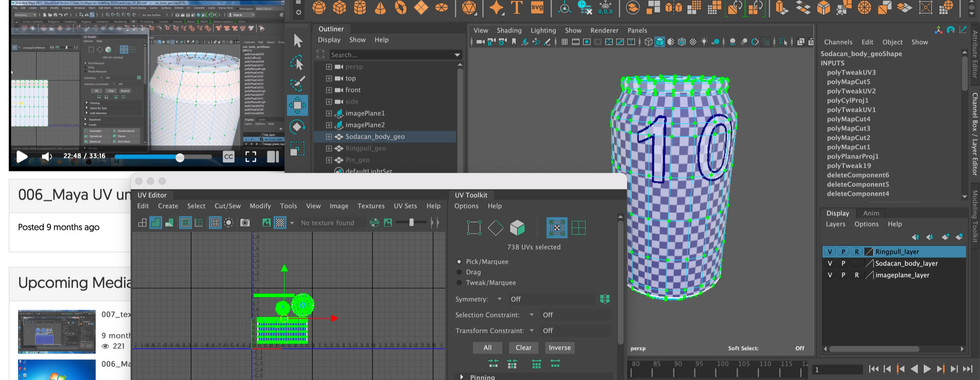
Video 6: Maya UV Unwrapping.

(the big one @ 34 minutes long)

The Soda-can Body.
The development of the UV.


The final UV map of the Soda-can Body.

I'm really pleased with the way this uv map has turned out. From my point of view it looks really good and I suppose right. Now I'm no expert by any stretch of abilities but, when I look at this it feels right and that is all that can be said for now.
UV Map issues.
First Attempt.

This first attempt looks a lot like a car crash and there a lot of issues going on that I'm not too sure about or even how to fix. So I will try again and see how it goes with a second attempt.
Second Attempt.

I didn't really have any issues with UV Mapping till it came to the ring pull.
In the end I decided to really take the ring pull apart and divide it up into several parts.
Final UV MAP for the Whole Model.

Now this looks more like it and I've added the can body and the pin as well which is also looking good.
The next step is to take this into photo shop and add the textures to the model.

With Material and Grids.


Gallery.
Part 1:


Part 2:


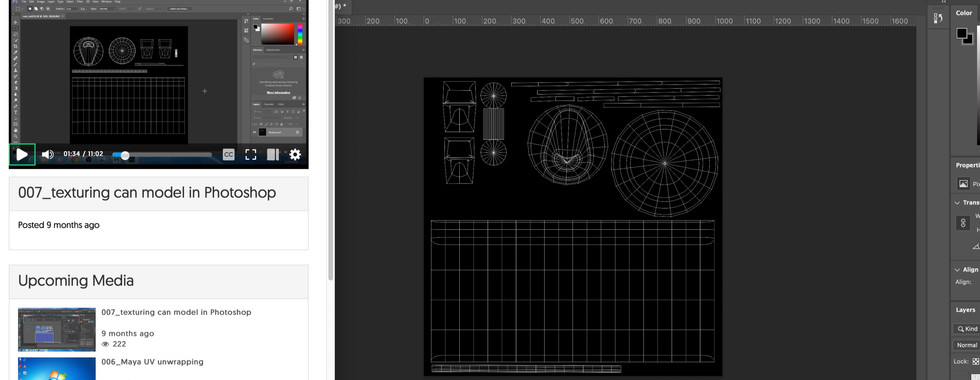
Video 7: Texturing the Soda-Can Model in Photoshop.


There's a slight difference between mine (on the left) which looks nothing like the one below.

I used a Coke material instead of an Irn-Bru can and if you break the connections on the transparency it will become a solid can.
Gallery.


Conclusions.

"It's the real thing"
(not quite, but pretty close)
So this project was supposed to be completed in Semester 1 of my masters program at the University of Dundee. The only problem is that I didn't have a computer to do it with until the very end of November and that left about 3 weeks to complete not only this one but a BobbleHead project.
Another issue regarding this project and the other one is that I have NEVER used Maya before this course. Not once have I ever used this program and opening it up for the first time on other projects (Rigging, Camera Tracking and my own project which began occurring in semester 2) was overwhelming and frightening.
I persevered on and kept going. There was a moment, around early summer, when I realised that something had gone array with my own personal work and I had modelled some furniture in a strange way that I felt that I needed to go back to the very beginning and start over.
I know it seems like a step back and I have missed the deadline by many many months but, by doing this now and because I've been using Maya for other projects I felt that I could now take on such a project with confidence.
To my surprise I actually finished the videos in three days. The extra bits took a little longer to achieve but, the core output was generated in just three days. Which for me seemed completely unthinkable less than a year ago.
This has been a personal achievement even though I know it won't make a difference to the outcome of my grade but, I've found this project useful in the development of hard surface modelling, texturing, lighting and rendering.
The difficulties that I faced were down to finding the right hot keys on my Mac computer vs a PC computer. This caused a massive issue when it came to isolating the top portion of the Soda-Can because this was the area where I had to the ring-pull and pin. In the end the area was isolated and these objects were made but, there was some stress for some time.


The end result looks really good and what I enjoyed most was the UV mapping. The can body was easy but again there was a problem with the ring-pull. For the this there was some real thought needed and outside the box thinking. I had to really work at where to put the cuts and match up the checkerboards.

All in all I have really enjoyed doing this project, it has helped me learn more of the tools within Maya and how they worked with each other and what they can do. I have also learned a lot about how to find mistakes within models.

I really wish I could have done this project at the beginning of the 1st Semester, back in 2020, however, better late than never.
Bonus Material.

Now that the model is made and has its materials added it's time to get serious about how to make it look top quality in the final output.
I'll start by adding some ice cubes.
Ice Cube Video:
Ice Ice Baby.
Notes:
First I created a cube and then used the vertex to deform it slightly before applying a texture. This solved many of my issues in achieving an ice-cube type object but there were still obstacles to overcome.


Once I'd found the "glass" texture and deduplicated the single cube into many (about 48) to be exact and re-arranged them around the soda-can it made the whole image take on life.


Right now there's a sky dome in place of lights which helps find the ice cubes because if they weren't in the light they would be lost.

Ice-Cube Gallery.


Now the lighting to make this can that much more appealing.
Notes:

Good idea to turn on the resolution gate when rendering. It helps frame the image even more.
Sang suggested the 3 point lighting system. So I'll look into that for this test run before applying it to my final project.
This can is a little too shinny for now and I haven't added the substance painter file yet so will have to add that back in to see how things look. I do think it's looking really quite good at the moment.
I know it is a small project and I'm trying to pimp it up with ice and and a frosty snowy background but, I am really pleased with the way it is turning out. The first time that I tried this back in November I couldn't even get this far so even if this is as far as I get then I know that I've improved.
Maya Lighting:
I could post so many video tutorials about 3 point lighting so I chose the ones that seemed to be the most helpful without being over complicated or too long.
First thing I'll need for my lighting set up is an infinity background.
Option A:
Created by using a non-liner bend and deform and turning down one of the bounds.


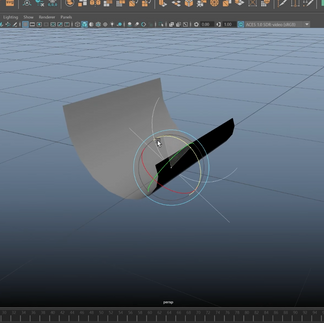


Option B:
Created by using a cube, reseting the origin point to the base and snapping it to the grid. Then in face mode taking away all but, two and bevelling the fold. Adding in extra segments to smooth things out and using the edge mode to lengthen out the top and bottom.


My Infinity Background.
I chose option "B" as it seemed to be the best suited to my purposes. There is a little more work involved in creating it however, the end result is a lot nicer and easier to work with.
Infinity Wall Gallery.


Notes:

Sang-Hun Yu's video on lighting from the Masters Course at DJCad about 45 minutes into the video.
First Studio Render.
A bit shinny and a little overworked.
Second Studio Render.
With a few adjustments and everything looking a little more realistic.
Which has turned out not too bad, in my eyes, but I'm no photographer so I can't really say with any real professionalism. If I had to make judgements on this I'd say that there are some parts that are a bit too sharp in lighting and maybe the can is too shinny in the first one. The second seems a little more real in material but, feels a little like a 3D model.
Lighting Gallery.


Let's see what substance painter can do to the material aspect of the image.
Substance Painter.
Now this is a rather long video of about an hour and 20 minutes however, it is very interesting and educational.
Substance Painter Notes.

So I managed to get the coke can texture image into Substance Painter however, after that I had trouble getting it to wrap around the model. Up to this point I have only created texture within the program and I feel this is a bit beyond me at the moment.
From here I took the can back into Maya where I know the texture works to see how things would turn out.
Hyper-shade Layout.

What I need to add to the can in Substance Painter but not sure how.
This means nothing if I can't get the texture onto the model in Substance Painter.
Gallery.


Now let's get a turntable or rotating camera for a nice 3D visualisation.
I'm not sure a turn table is needed for this but, it can't hurt.
Maya Turntable/Maya 3D Camera:
Turn-Table Video.


Comments